


Paper-Thin Slices Made Easy: Vegan Chef’s Paring Knife Know-How
Welcome to the exciting world of knife skills, where your kitchen prowess gets an instant upgrade! Think of your knife as an extension of your hand—a tool that turns humble veggies into edible masterpieces. Whether you’re perfecting your slicing game for a vibrant vegan taco night or prepping ingredients for a cozy weeknight soup, mastering your knife technique is like unlocking a cheat code for effortless cooking.

Introduction to Knife Skills
Welcome to the exciting world of knife skills, where your kitchen prowess gets an instant upgrade! Think of your knife as an extension of your hand—a tool that turns humble veggies into edible masterpieces. Whether you’re perfecting your slicing game for a vibrant vegan taco night or prepping ingredients for a cozy weeknight soup, mastering your knife technique is like unlocking a cheat code for effortless cooking.
Now, don’t worry if you’re not exactly a pro yet. Knife skills aren’t about speed (you’re not in a race!) but about precision and control. Start slow, and let the blade do the work. A sharp knife is your best friend here—don’t be tempted to muscle through with a dull one. Trust me, no carrot deserves that kind of abuse, and your fingers will thank you for the extra caution.
Here’s where it gets fun: a paring knife. Small but mighty, this versatile little tool is perfect for tasks that require a delicate touch. From peeling stubborn citrus to making precise cuts on tiny ingredients, it’s your go-to for detail work. This isn’t the knife for chopping a mountain of onions, but when it comes to finesse? It’s a star. Think of it as the artist’s brush in your culinary toolkit.
Grip matters, folks! Hold the knife with confidence, but don’t strangle it—it’s a knife, not a stress ball. Your guiding hand (the one not holding the knife) plays a huge role too. Keep those fingertips tucked under, using your knuckles as a guide for the blade. This technique, affectionately called the “claw,” ensures your fingers stay safe while you slice with precision. Plus, it looks super professional.
And let’s not forget posture—yes, posture! Stand tall, keep your cutting board at a comfortable height, and let your movements flow naturally. If you’re hunched over like a question mark, it’s not just your back that’ll suffer; your cuts will lose their consistency too. You want your slices as even as your Netflix watchlist organization (don’t pretend you don’t have one).
Knife skills aren’t just about efficiency—they’re also about elevating your cooking experience. There’s a certain satisfaction that comes from watching perfect slices stack up neatly, or from realizing you’ve just chopped a bundle of herbs without turning them into a bruised mess. It’s oddly therapeutic, like adult coloring books but with a side of garlic.
Choosing the Right Paring Knife

When it comes to kitchen tools, the paring knife may not be the flashiest, but it’s like the MVP of the utensil drawer—small, reliable, and always ready to shine when precision is key. This little dynamo, with its 3 to 4-inch blade, is perfectly sized for those intricate, up-close tasks that other knives simply can’t handle. Think of it as the scalpel of your kitchen, but, you know, less intimidating and much more fun.
What makes a paring knife the right one for you? First off, comfort is king. A handle that feels awkward or slippery is a dealbreaker because, let’s be real, no one wants a knife that doubles as a stress test for your grip strength. Look for a design that fits snugly in your hand—bonus points if the handle feels like it was custom-made just for you. Material matters too; wooden handles have that rustic charm, but stainless steel or composite handles are the way to go for durability and easy cleaning.
Now, let’s talk blades. A sharp stainless steel blade is your best bet—it’s sturdy, resistant to rust, and slices like a dream. You’re aiming for a knife that can peel a peach as effortlessly as it can trim the stems off strawberries. And here’s a pro tip: slightly curved blades can make certain tasks—like coring fruits or deveining jalapeños—feel like a breeze, while straight blades are perfect for detailed work like trimming or scoring. Pick your poison, or better yet, have both types in your arsenal.
Weight is another factor to consider. A paring knife shouldn’t feel heavy or clunky—if it does, that’s a red flag. This is a knife you want to wield with finesse, so a lightweight design is essential. You’re aiming for control, not arm day.
And don’t overlook build quality. A full-tang knife (where the blade extends through the handle) offers better balance and durability than partial-tang versions. It’s the kind of detail you might not notice immediately, but trust me, you’ll thank yourself later when your knife feels like an extension of your hand.
Once you’ve found the perfect paring knife, you’ll wonder how you ever managed without it. From de-seeding chili peppers to cutting citrus garnishes with pro-level precision, this little powerhouse will become your secret weapon for making every dish look (and taste) like a masterpiece. Just remember, the right paring knife doesn’t just complement your skills—it amplifies them.
Mastering Paper-Thin Cucumber Slices

When it comes to achieving those impossibly thin cucumber slices, precision is your best friend—and so is your trusty paring knife. Start by securing the cucumber on a stable cutting surface. No wobbly veggies here! Using a paring knife gives you total control over each slice, so hold it with a firm but relaxed grip. The trick is to angle the blade slightly and let the knife glide through the cucumber, rather than forcing it. Remember, your knife is doing the heavy lifting, not your wrist.
Here’s where things get a little fun: the rhythm. Keep your cutting hand steady and your movements smooth, like you’re conducting a symphony of slices. With each pass of the blade, guide your knife gently, moving your supporting hand back gradually. Think of it like a slow dance, except your partner is a cucumber, and the end goal is culinary perfection.
Oh, and one secret to nailing this technique? Confidence. Even if you’re internally panicking, channel your inner food network star and go for it. You don’t have to be a pro chef to slice like one—just focus on staying consistent. If one slice ends up looking like a potato chip while the next one could double as a contact lens, don’t sweat it. You’ll get the hang of it with practice, and no one’s judging your first attempts.
And let’s talk knife sharpness for a second. A sharp paring knife isn’t just a luxury—it’s essential. A dull blade will only squish the cucumber, and honestly, you don’t need that kind of stress in your life. With a sharp blade, you’ll get those clean, paper-thin slices that practically scream, “I know what I’m doing in the kitchen!”
If you’re feeling extra fancy, try cutting the cucumber at a slight diagonal angle. Not only does it make for wider, more aesthetically pleasing slices, but it also adds a little flair to your salads and appetizers. Instagram-worthy? Absolutely.
One last pro move for all you perfectionists out there: use your knuckles as a guide to keep the blade in line. Your fingertips are tucked safely away, and you’ll look like you’ve been doing this for years. Plus, once you get the hang of it, slicing cucumbers becomes oddly satisfying—like bubble wrap but for chefs.
Precision Cutting for Herbs

Herbs might be small, but they pack a punch—and that’s why treating them with care is key to unlocking their full potential. Grab your paring knife, that trusty little workhorse, and get ready to level up your herb game. Whether you’re working with delicate basil, feathery dill, or stubborn rosemary, the right technique will have you slicing like a total pro without turning your herbs into a green smudge.
First, let’s talk about the grip—yours, not the herbs’. Hold your paring knife securely, but keep it relaxed, like a handshake with someone you want to impress, not crush. The goal is smooth, controlled movements, not aggressive chopping. When it comes to the herbs themselves, gather them into a neat little bundle. If they’re being particularly rebellious and slipping all over the place, roll them up gently like you’re tucking them into bed. You want those leaves to stay together, so you can glide through them with ease.
Here’s the trick: a sharp blade and a light touch. Pressing down too hard is the quickest way to bruise those leaves, and bruising means flavor loss—nobody wants to serve a pesto that tastes more “meh” than marvelous. Keep your knife angled slightly and let it do the work for you. Use a gentle rocking motion with the blade, guiding it forward as you slice. No need to hack at the herbs like you’re fending off a jungle; you’re going for clean, precise cuts, not an herbal massacre.
And let’s address the bane of every home cook: stems. Some herbs, like parsley and cilantro, are forgiving—you can chop their stems along with the leaves without anyone noticing. But others, like thyme or rosemary, are a bit pickier. For these, strip the leaves by running your fingers down the stem in the opposite direction of growth. Think of it as a reverse high-five. Once you’ve got your pile of leaves, they’re ready for their close-up under your paring knife.
Feeling fancy? Use the tip of your knife for extra precision. It’s perfect for fine-tuning those final cuts or trimming away any stray bits that didn’t get the memo to stay in the bundle. This small detail might seem unnecessary, but trust me, it’ll make all the difference when your freshly chopped herbs look as good as they taste.
Oh, and don’t forget to inhale deeply as you work. The aroma of freshly sliced herbs is like a mini spa session for your senses, so take a moment to enjoy it.
Effective Mushroom Preparation
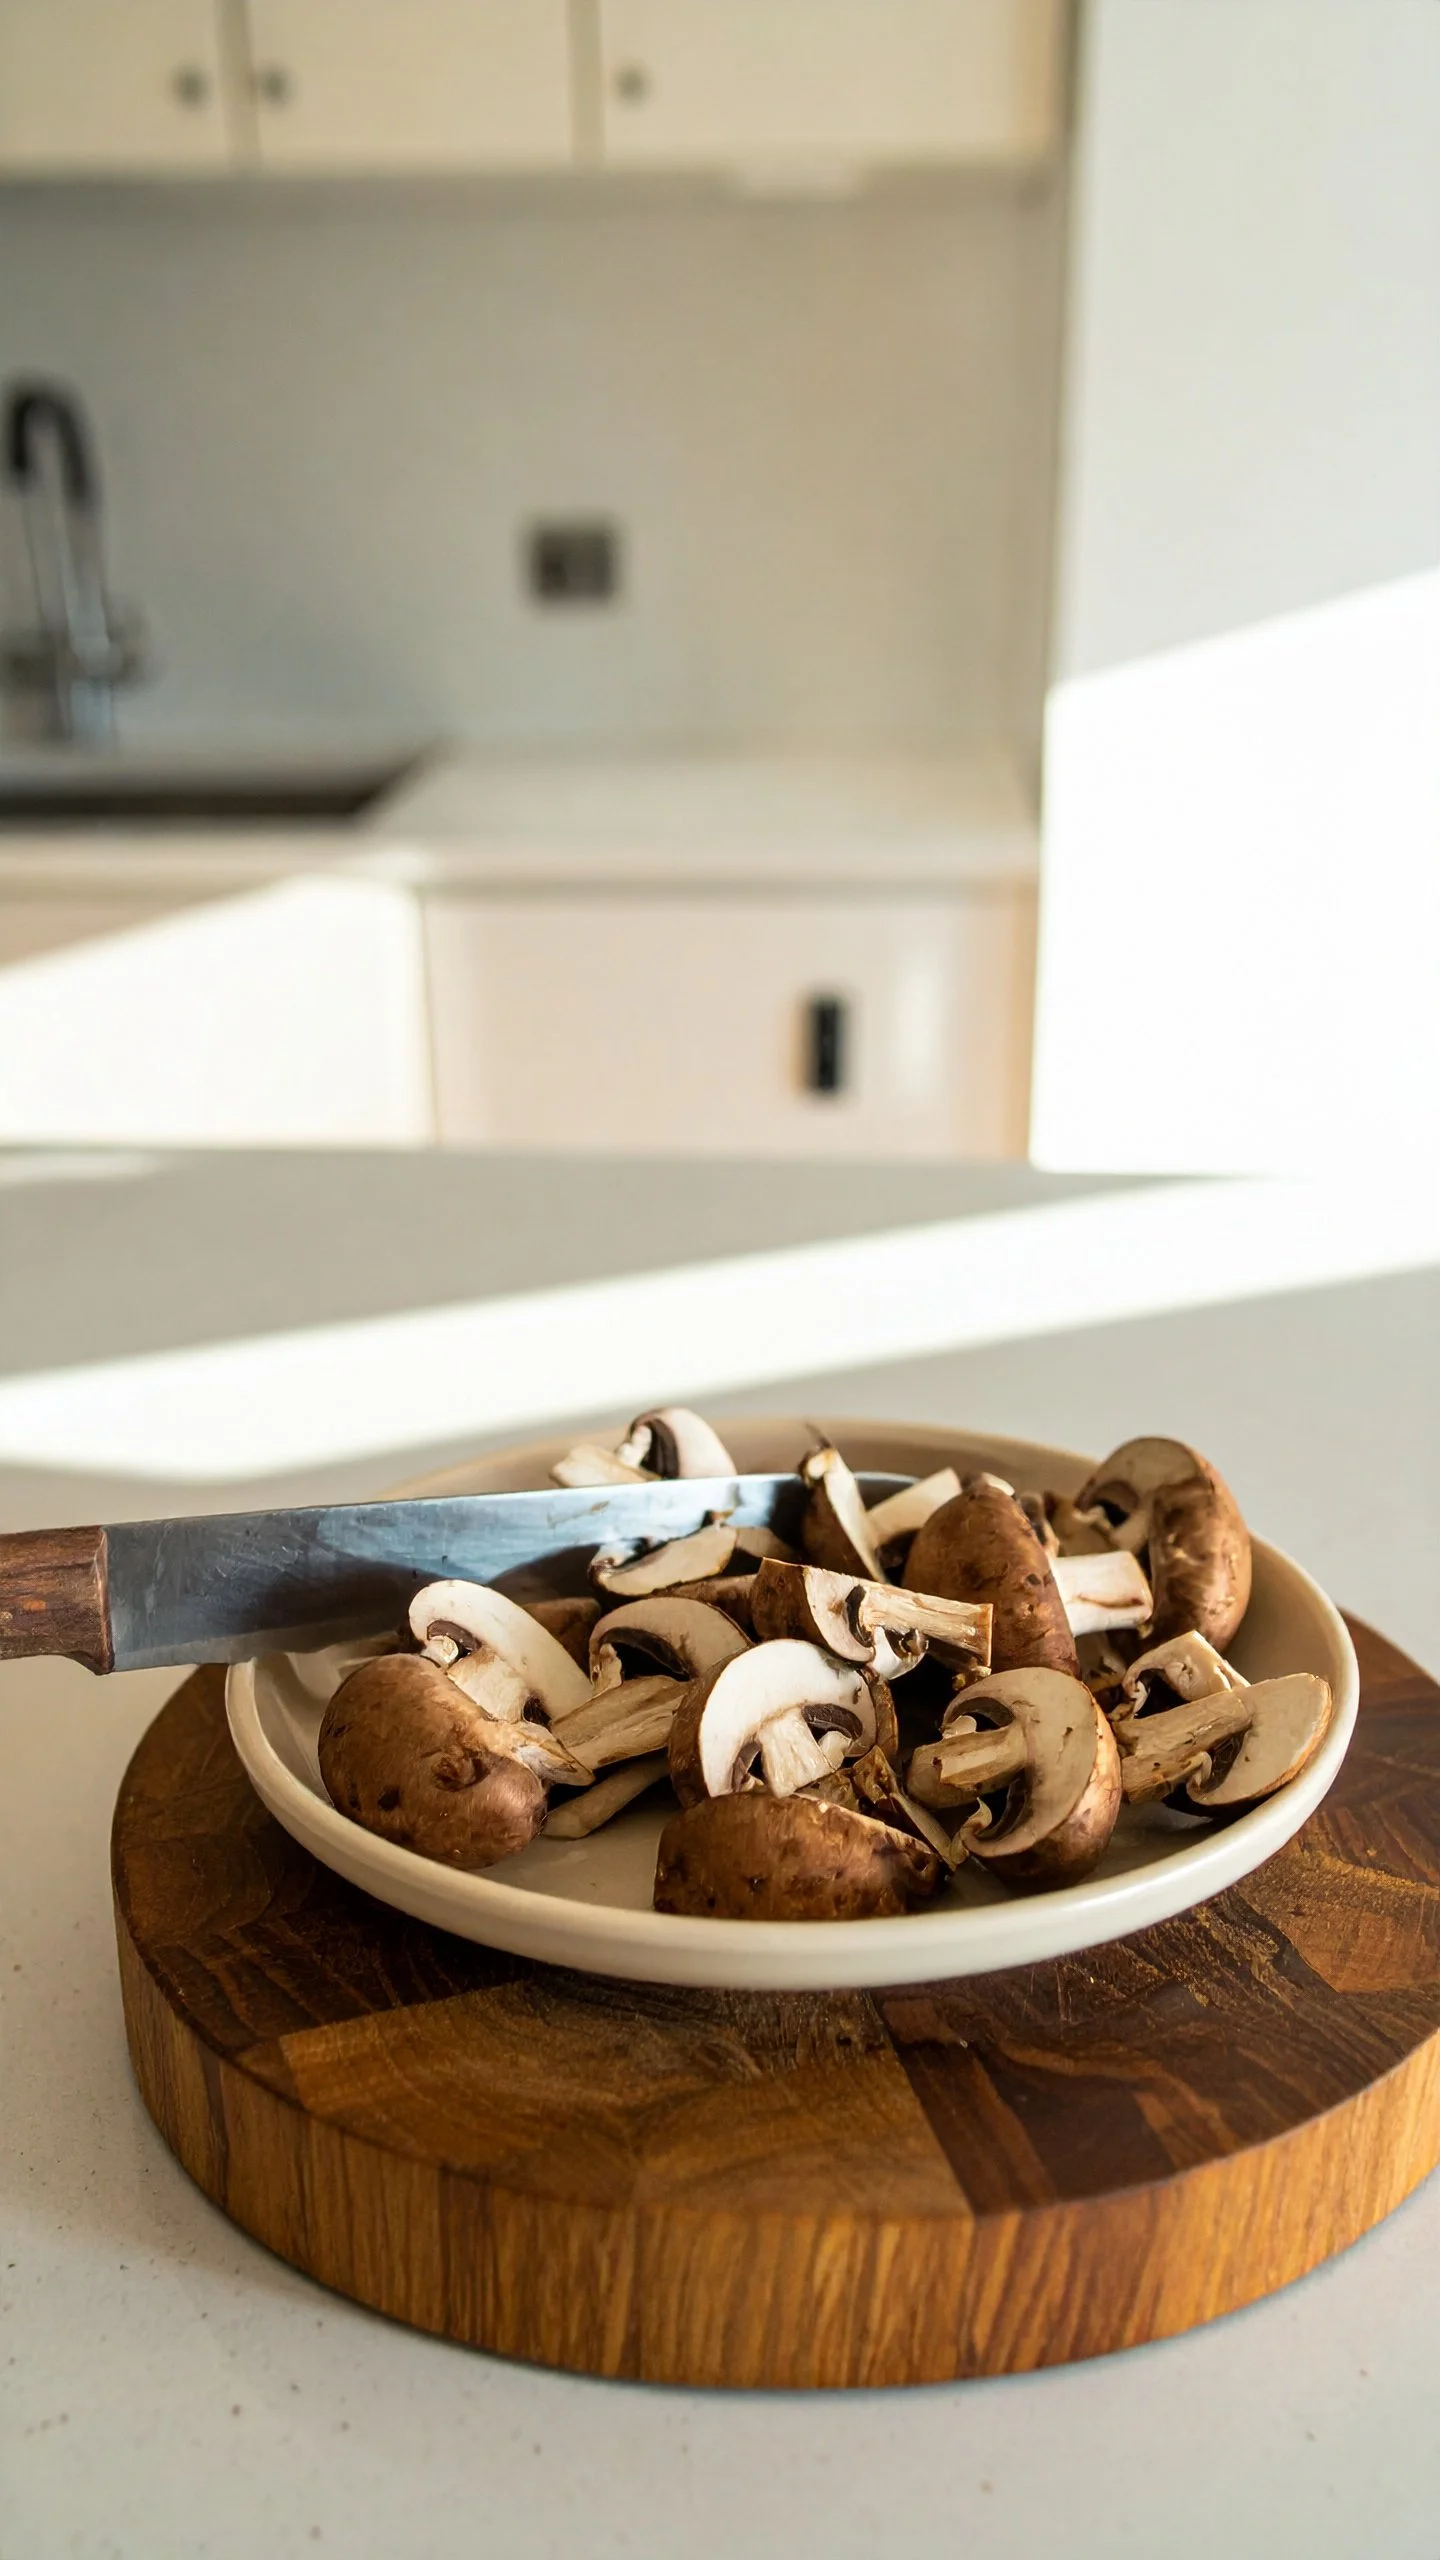
Mushrooms are the ultimate shapeshifters in the kitchen—they can be meaty, earthy, or melt-in-your-mouth tender, depending on how you prep them. First things first, let’s talk about cleaning these little fungi friends. Contrary to popular belief, mushrooms aren’t trying to ruin your day—they’re just a bit delicate. Instead of giving them a full-on bath, use a damp paper towel or a soft brush to gently wipe off any dirt. Think of it as a spa day for your mushrooms; they’ll appreciate the TLC, and you’ll avoid turning them into waterlogged messes.
Now, onto the fun part: slicing! Grab your trusty paring knife and get ready to transform those mushrooms into little works of culinary art. For button mushrooms or cremini, you’ll want to hold the cap steady with one hand while your knife does all the work. Glide the blade through the mushroom in smooth, even motions, aiming for slices that are as consistent as the perfectly folded laundry you aspire to have. Whether you’re going for chunky pieces for a hearty stew or thin slices for a stir-fry, the key is steady hands and a sharp knife. Remember, mushrooms are soft, so you’re not sawing through a log—let the knife do its thing.
If you’re working with mushrooms that are a bit more fancy-pants, like shiitakes or portobellos, a little extra prep is in order. For shiitakes, remove those woody stems before slicing; they’re about as fun to chew as tree bark. Just give the stems a quick trim with your knife, and voilà—ready for slicing. Portobellos, on the other hand, might need their gills scraped out if you’re aiming for a prettier presentation. Use the edge of your knife or a spoon to gently scoop out the dark gills, and boom, you’re ready to slice those big beauties into steaks, strips, or whatever your recipe demands.
Here’s a pro tip: if you’re dicing mushrooms for something like a filling or sauce, start by slicing them into planks, then stack those planks and cut them into strips. Rotate the strips and chop them into evenly-sized pieces. It’s like mushroom origami, but instead of paper cranes, you get perfect little cubes that cook evenly and look like you really know what you’re doing.
And let’s not ignore those funky-shaped mushrooms like oyster or enoki. They’re like the rebels of the fungi world, but your paring knife has got you covered. For oyster mushrooms, trim the tough base and tear them into smaller pieces with your hands—they’re basically begging for that rustic look. Enoki mushrooms are a breeze; just trim off the root cluster and separate them into smaller bunches. Easy-peasy and ready for action.
Caring for Your Paring Knife

Your paring knife might be the smallest member of your kitchen arsenal, but it deserves VIP treatment to keep it performing like a champ. Start by giving it the respect it deserves during cleanup—skip the dishwasher! Seriously, the heat and detergent in there are basically a death sentence for sharp blades. Instead, wash your knife by hand with warm, soapy water. A quick rinse and gentle scrub are all it takes to keep it sparkling clean. Just make sure you dry it immediately. Leaving your knife to air-dry is like leaving your laundry in the washer—it won’t end well.
Storage is another biggie when it comes to keeping your knife in tip-top shape. Tossing it into a drawer with your other utensils? That’s a fast track to scratches and dullness—not to mention a potential hazard for your fingers. Instead, go for a knife block, a magnetic strip, or even a protective sheath. These options not only keep your blade sharp but also ensure you won’t accidentally grab the sharp side when reaching for your spatula. Safety first, my friends.
And let’s not forget about sharpening—it’s the secret sauce for any great knife. A dull knife isn’t just frustrating; it’s actually more dangerous since you’re more likely to slip while trying to cut. A whetstone or a sharpening rod works wonders for keeping that edge razor-sharp, but if that feels a bit intimidating, no judgment here—plenty of kitchen stores or services can handle it for you. Aim to sharpen your paring knife every few months, depending on how often you use it. Trust me, the difference between a sharp knife and a dull one is like the difference between cutting butter and cutting a brick.
While we’re talking maintenance, let’s chat about honing. Honing isn’t the same as sharpening—it’s more like realigning the blade to keep it performing at its best. A few gentle strokes along a honing steel before or after each use can do wonders for your knife’s longevity. Think of it as a little warm-up and cool-down routine for your kitchen MVP.

If your knife has a wooden handle, don’t forget it needs some love too. A little food-safe mineral oil rubbed onto the handle every now and then will keep it from drying out or cracking. For composite or stainless steel handles, a quick wipe with a damp cloth will do the trick.
A well-cared-for paring knife doesn’t just make slicing and dicing easier—it makes the whole cooking experience more enjoyable. After all, there’s something downright satisfying about a tool that feels as sharp and reliable as the day you got it. Treat your knife like the rock star it is, and it’ll reward you with years of flawless performance.

Knife Skills That Change the Way Food Feels
Angles are everything when it comes to how your food feels as you eat it. Picture this: you’re slicing into a crunchy cucumber. A straight cut delivers those classic, no-nonsense rounds that snap with each bite, but tilt your knife just a smidge, and suddenly you’ve got oblong slices that feel smoother and more refined. It’s almost as if the cucumber went to a spa and came out feeling fancy. This isn’t just about appearances—it’s about how the food interacts with your teeth, tongue, and even your expectations.
Influence of Cutting Angles on Texture

Angles are everything when it comes to how your food feels as you eat it. Picture this: you’re slicing into a crunchy cucumber. A straight cut delivers those classic, no-nonsense rounds that snap with each bite, but tilt your knife just a smidge, and suddenly you’ve got oblong slices that feel smoother and more refined. It’s almost as if the cucumber went to a spa and came out feeling fancy. This isn’t just about appearances—it’s about how the food interacts with your teeth, tongue, and even your expectations.
Here’s where the magic happens: the angle of your cut alters the surface area of each piece. A diagonal slice on a carrot or zucchini gives it more room to cook, soak up seasoning, or even just sit prettily on a plate. Meanwhile, a chunkier, straight-down chop keeps it sturdy and unapologetically bold in its crunch. It’s like a personality shift for your ingredients—same food, but an entirely different vibe.
Now think about something like potatoes. Slice them into thin, consistent rounds, and you’re on your way to making a crisp, golden heap of chips or gratin that practically shatters in your mouth. On the other hand, cube them, and they take on a whole new texture—pillowy on the inside and golden on the edges when roasted. The way you angle your knife dictates whether you’re diving into a crunchy bite or savoring a soft, buttery center.
But cutting angles aren’t just for veggies—they can transform your fruit game, too. Take a juicy orange, for example. A cross-section slice shows off that iconic starburst design, perfect for snacking or garnishing a cocktail. But a wedge, sliced at an angle, feels juicier and more playful, as if it’s daring you to squeeze the sweetness out. Even something as humble as an apple can be elevated when you experiment with different shapes. Slicing it thinly on a bias feels sophisticated, while chunky, irregular cuts bring a rustic charm to a pie or crumble.
Angles can even enhance the mundane. Ever tried cutting bread at an angle instead of straight across? Suddenly, that same loaf feels artisanal, the slices practically begging to be slathered in butter or dunked in soup. There’s something about that elongated cut that makes it feel like you’re holding a little luxury in your hands.
And don’t get me started on herbs! Sure, you can chop them into tiny confetti-like pieces, but try slicing basil leaves into long, elegant ribbons. That little change gives your dish an extra touch of elegance while keeping the herb’s bright flavor intact. It’s like dressing your food up for a night out—it’s still the same basil, just with a touch more flair.
Cutting angles aren’t just a technical detail—they’re an invitation to play, to explore how subtle changes can turn an ordinary ingredient into something unexpected. So the next time you reach for your knife, remember: a small twist of the blade can open up a world of textural possibilities.
Crafting Tender vs. Firm Textures

Ever had a bite of meat that seemed to fight back, refusing to yield to your teeth, and thought, “What went wrong here?” The secret lies in the direction you slice. Meat has a natural structure, almost like a roadmap, with visible lines running through it—those are the muscle fibers, also known as the grain. How you cut across this grain makes all the difference between a melt-in-your-mouth bite and one that gives your jaw a workout.
When you cut against the grain, you’re essentially shortening those long muscle fibers, making each piece easier to chew. It’s like creating tiny shortcuts for your teeth to follow. This technique works wonders for tougher cuts of meat, like flank steak or brisket, where the fibers tend to be more pronounced. You’re turning what could be a workout into an effortless, tender experience. Picture this: a perfectly cooked steak, juicy and full of flavor, sliced thinly across the grain. The fibers are so short, they almost disappear as you chew. It’s like the meat is giving you a high-five for doing it right.
Now, cutting with the grain is a whole different story. Instead of breaking up those fibers, you’re leaving them intact, which results in a firmer, chewier texture. While this might sound like a no-go, it’s actually ideal for certain dishes. For example, if you’re making jerky or something that benefits from a little extra chew, slicing with the grain keeps the structure intact, giving you that satisfying resistance. It’s a textural choice that can add character to your dish, making it more engaging to eat. Sometimes, a little chewiness is just what you need to slow down and savor the flavors.
What’s fun about playing with the grain is how much control it gives you over the dining experience. Even within a single cut of meat, you can experiment. Take a pork tenderloin, for instance. Slice some pieces against the grain for those delicate, buttery bites, and leave others with the grain for a heartier texture that holds up well in a stir-fry or stew. It’s like creating two completely different dishes from one ingredient.
And don’t think this is just about red meat! The same concept applies to poultry and even fish. Ever notice how a perfectly cooked chicken breast shreds effortlessly into tender strips? That’s because those strips run with the grain of the meat. Now imagine slicing it across the grain into bite-sized pieces instead—suddenly, you’re serving up tender morsels that feel different in your mouth but are just as flavorful. For fish, especially flaky varieties like salmon, understanding the grain can help you achieve those beautiful, clean slices that almost melt on the tongue.
Let’s not forget the role of temperature in all of this. Chilled meat is much easier to slice precisely, so popping your cut in the fridge for a bit before slicing can work wonders. And a sharp knife is non-negotiable—anything less risks shredding those fibers instead of cleanly slicing through them. Plus, let’s be real: slicing meat cleanly is deeply satisfying in its own right, like achieving a tiny culinary victory every time your knife glides through.
So next time you’re prepping meat, take a moment to notice the grain. Tilt your knife, make that slice, and let the fibers guide you toward the texture you crave.
Precision in Knife Work for Desired Texture

There’s a kind of artistry in wielding a knife with purpose, like you’re not just cooking but creating. The way your blade glides through an ingredient can completely change its character, turning something simple into a whole new experience. Precision isn’t just about making things look pretty (though, let’s admit, that’s a nice bonus). It’s about unlocking the best version of every ingredient on your cutting board.
Think of slicing a tomato. A sharp, purposeful cut gives you even, intact slices that hold their shape and shine on a sandwich or salad. But press too hard with a dull blade, and you’re left with a squashed, leaky mess that tastes the same but somehow feels less special. It’s a small thing, but it matters—precision lets you control the outcome.
And then there are onions. The unsung hero of the flavor world, onions deserve more respect than they get. When you chop one into consistent, evenly sized pieces, you’re doing more than just making it look good. You’re ensuring they cook at the same rate, whether you’re caramelizing them for hours or tossing them into a quick stir-fry. Those clean cuts mean no stragglers get left behind, either raw or overcooked. It’s like giving each bite a chance to shine in perfect harmony.
But precision doesn’t stop at the obvious stuff. Have you ever julienned a carrot? Those whisper-thin, matchstick slices feel completely different in your mouth compared to a hefty chunk. They also cook faster and can take on dressings or sauces more easily. It’s not just a visual upgrade—it’s a functional one. Suddenly, your everyday carrot is playing a starring role instead of being an afterthought.
And let’s talk about herbs for a second. Sure, you could rough-chop parsley or cilantro, and they’d still taste great. But when you slice them cleanly with a sharp knife, you’re protecting their delicate flavors and avoiding the dreaded bruising that makes them go dark and sad-looking. A fine chiffonade of basil isn’t just elegant; it’s an aromatic flourish that feels as fresh as it looks.
Even something as basic as cutting bread transforms with precision. A clean, angled slice opens up more surface area for toppings or dips to cling to. Suddenly, toast isn’t just toast—it’s a canvas. You’re not just cutting food; you’re creating textures that enhance how you experience every bite.
It’s all about the relationship between you, your knife, and the ingredient in front of you. Precision isn’t fussy or over-the-top—it’s the secret to unlocking potential in even the simplest of foods. And the best part? There’s no one right way to do it. Play with thickness, angle, and shape to discover what works best for you. Because every cut tells a story, and sometimes, the story is as exciting as the meal itself.
Improving Cooking Results

Mastering your knife skills isn’t just about aesthetics—it’s about turning the ordinary into extraordinary. The way you slice an ingredient can completely change how it cooks, absorbs flavors, and even how it feels on your tongue. Take garlic, for instance. Crush it, and you unleash its bold, fiery edge; mince it finely, and it melts into a dish, creating a soft, garlicky hum that lingers in the background. It’s the same clove, but your knife decides its destiny.
Think about marinades. When you slice proteins like chicken or pork into thinner pieces, or score the surface with shallow cuts, you’re inviting those rich, tangy flavors to dive in and make themselves at home. A chunk of meat with no prep? Sure, it might taste good on the outside, but it’s like a party that never made it past the front door. Those small adjustments in shape and size are the secret handshake that lets flavors seep into every bite.
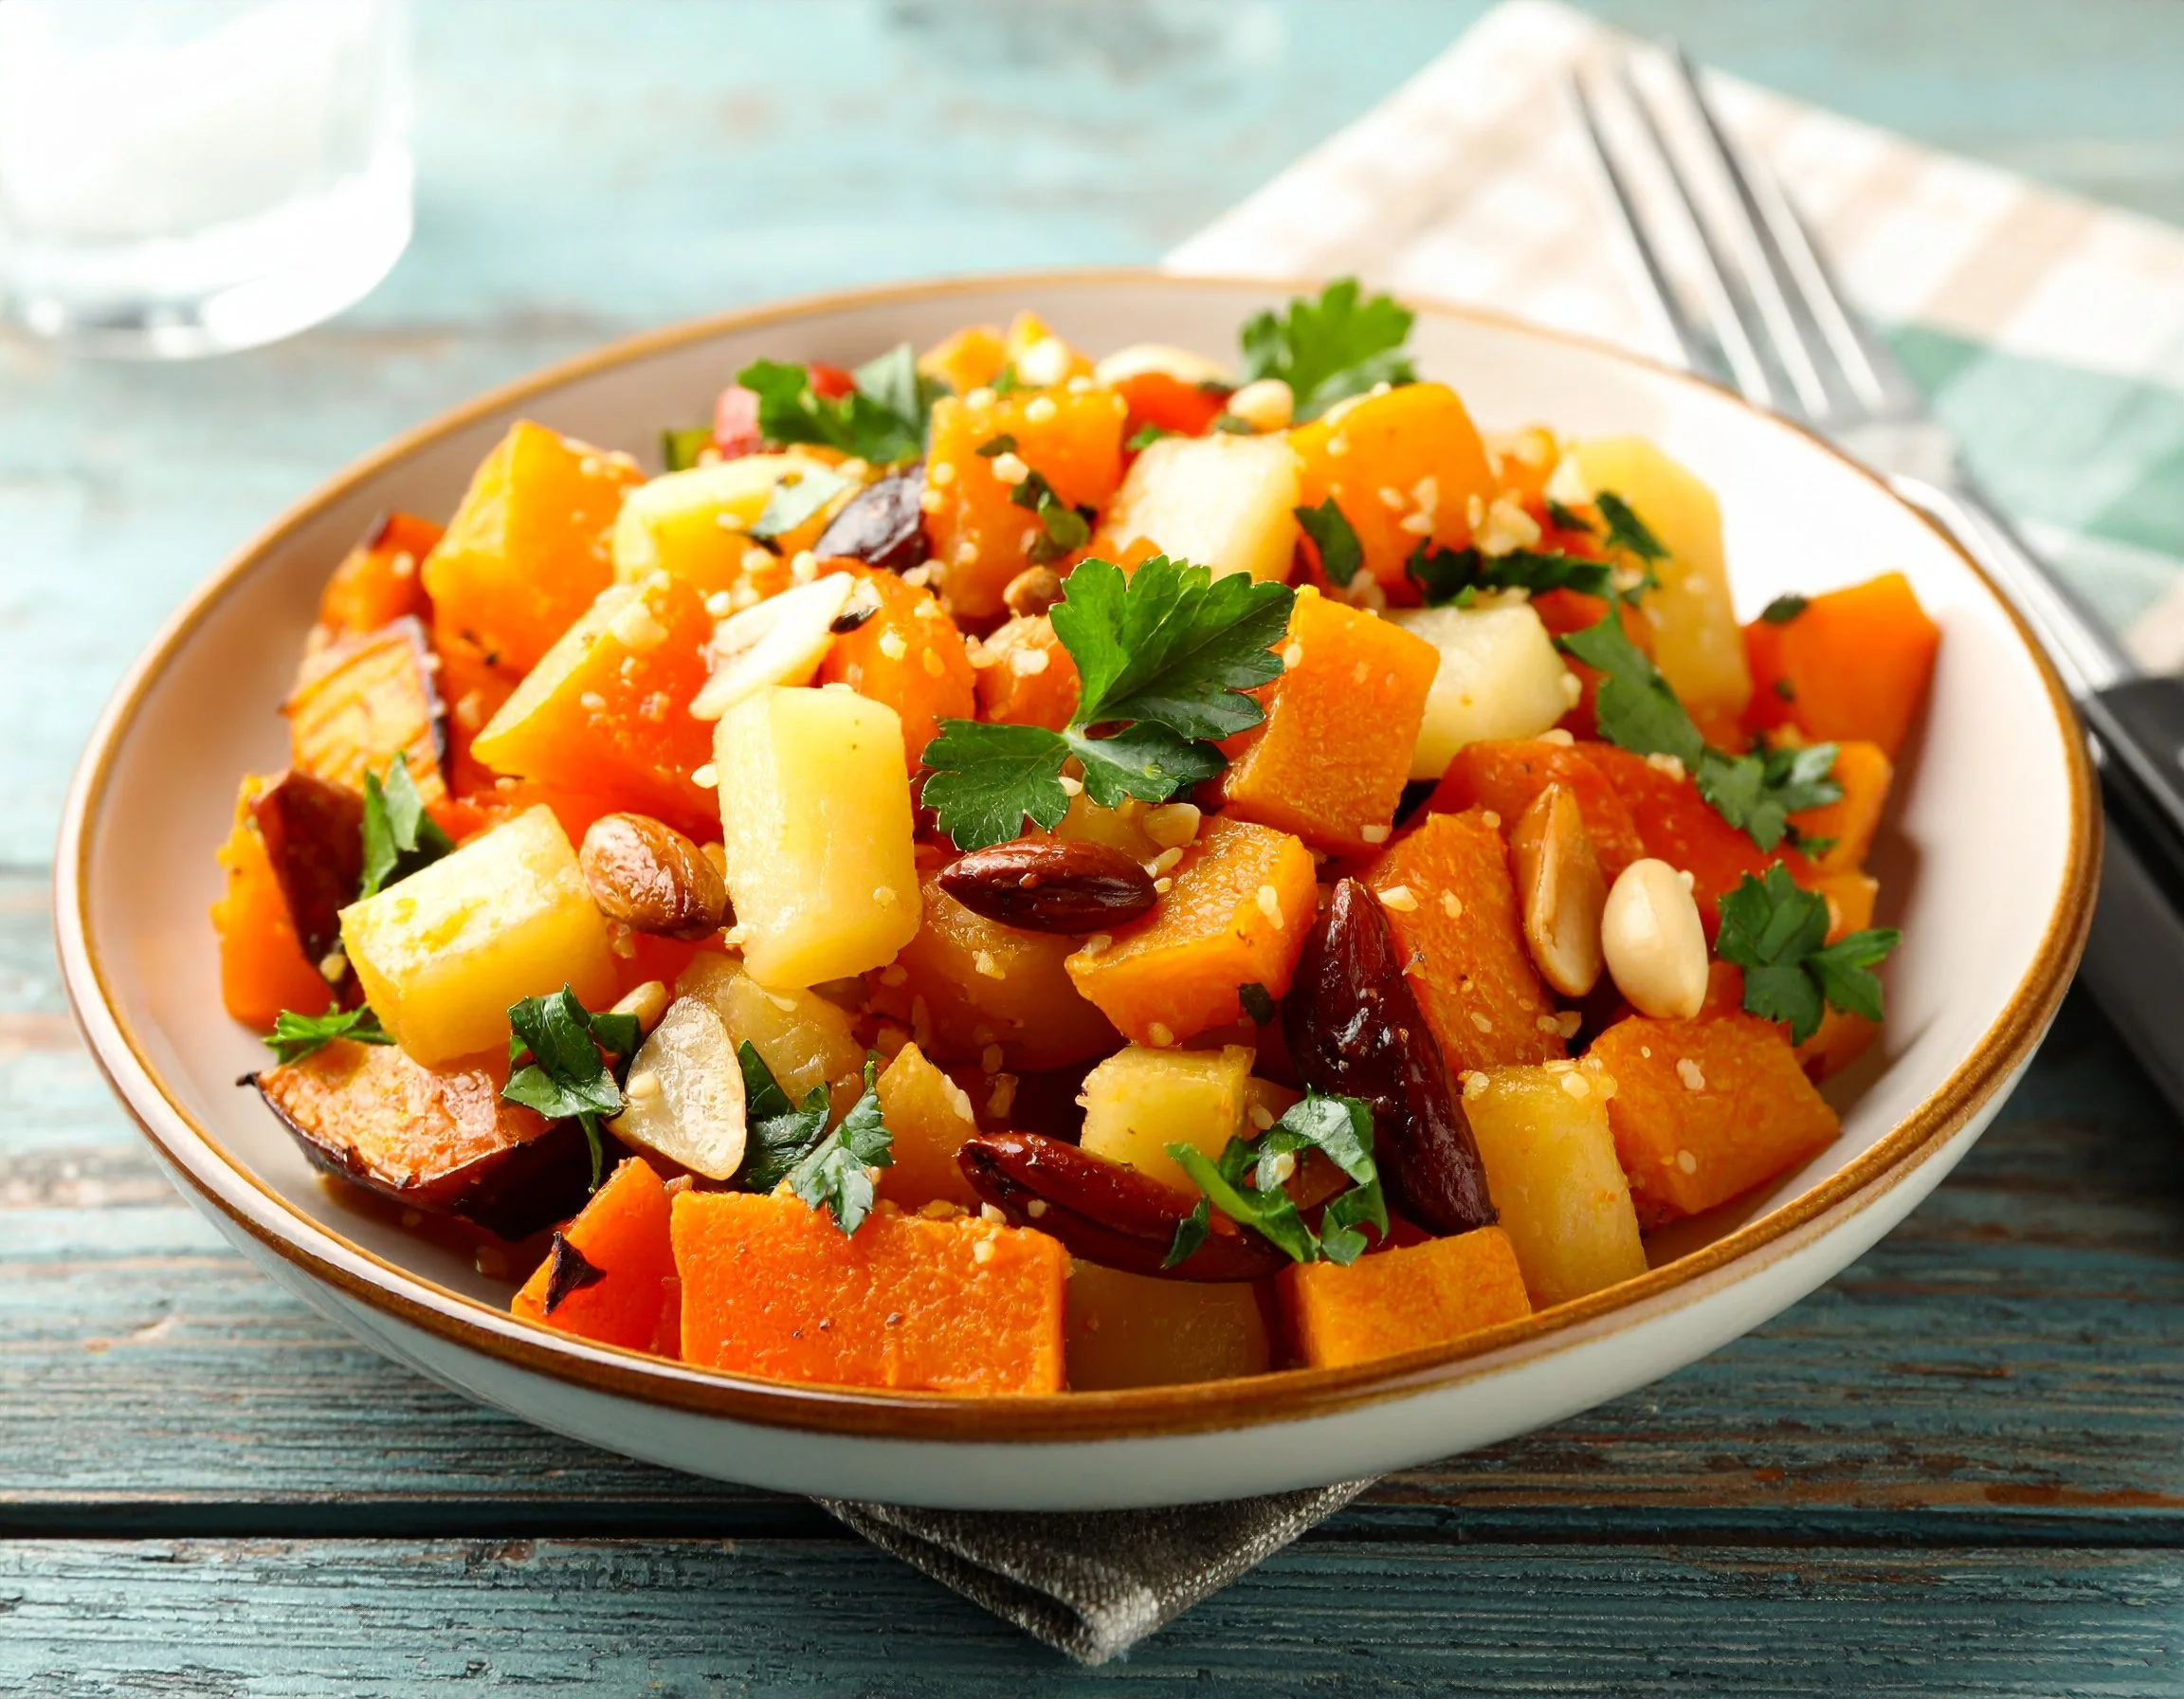
And then there’s the magic of even cooking. Picture a tray of vegetables you’re about to roast. If some pieces are too big while others are tiny, you’ll end up with a mix of mushy and burnt. But when everything’s cut to a similar size? They caramelize together in glorious harmony, each piece golden and full of sweet, roasted depth. Suddenly, your tray of veggies isn’t just a side dish—it’s stealing the spotlight.
Ever noticed how pasta dishes in fancy restaurants always seem so cohesive? That’s because chefs don’t just grab any knife and start chopping. They think about how each ingredient interacts. Those slender ribbons of basil, paper-thin slices of garlic, and perfectly diced tomatoes are carefully cut to complement each other. It’s like assembling a puzzle where every piece clicks into place, creating something greater than the sum of its parts.
Even the way you cut something as simple as an onion can change the way it behaves in a dish. Dicing it small will let it disappear into sauces, creating a subtle sweetness without stealing the show. But slice it into bold, crescent-shaped wedges, and it holds its shape, adding texture and a bit of bite. The best part? You get to choose what kind of personality that onion brings to the table.
And let’s not overlook the role of heat. The surface area of your ingredients directly affects how quickly they cook. A thick carrot coin takes ages to soften, but a thin julienned stick? It’s ready in no time. This isn’t just about efficiency—it’s about control. You get to decide how much snap or tenderness makes it onto the plate. It’s a small detail, but it turns cooking into an act of precision and creativity.
Your knife is more than just a tool; it’s an extension of your culinary imagination. Every slice, chop, and dice is a decision, a way to coax out flavors, textures, and even the visual appeal of what you’re making. So go ahead—grab your knife, channel your inner artist, and watch as your cooking transforms before your eyes.
Practical Tips for Home Cooks

When it comes to honing your knife skills, the best place to start is right in your own kitchen. First off, invest in a sharp knife and learn to love it—there’s nothing worse than trying to slice a tomato with a dull blade and ending up with a squashed mess. A sharp knife not only makes your cuts cleaner but also safer, as you’re less likely to slip. Pair it with a sturdy cutting board that doesn’t slide around, and you’re already ahead of the game.
Now, let’s talk grip. Ever noticed how chefs hold their knives with confidence, fingers pinching the blade just above the handle? That’s no accident—it gives you more control and power. If you’ve been clutching the handle like a baseball bat, it’s time to level up. Practice this grip a few times, and you’ll feel like you’ve unlocked a new superpower.
Don’t forget to take your time. Speed looks cool, but precision wins every time. Start slow and focus on getting consistent slices or dices. Consistency is the secret sauce to even cooking, and it makes your dish look like it came straight out of a professional kitchen. Your roasted veggies will thank you, trust me.
One pro tip that’s often overlooked: pay attention to your ingredients’ natural shapes. Not everything needs to be forced into a uniform cube. Embrace curves, angles, and textures. Got an onion? Try thin slices for salads or bold wedges for roasting. Working with herbs? Stack, roll, and slice instead of chopping chaotically—your basil leaves will stay vibrant and beautiful instead of turning into a sad, green mush.
And here’s a fun experiment: mix up your usual cutting techniques. Instead of defaulting to chunks, try ribbons, matchsticks, or even a fine dice. You’ll be amazed at how something as simple as a zucchini can feel fresh and exciting when cut differently. Plus, playing around with shapes keeps cooking interesting—think of it as culinary doodling.
For those trickier ingredients, like slippery peppers or round tomatoes, cut a small flat edge first to stabilize them. It’s a small step that makes slicing so much easier. And for those who dread cutting onions because of the tears—pop them in the fridge for a bit beforehand. It won’t make the tears disappear completely, but it’ll dial down the drama.
Lastly, make cleanup part of your routine. Keep a damp towel nearby to wipe your blade in between cuts, especially when working with sticky ingredients like garlic. A clean knife not only feels better to use but also helps maintain those sharp edges.
The most important tip? Give yourself room to experiment and mess up. The kitchen is your playground, and a little practice (and maybe a few crooked cuts) will eventually lead to some seriously impressive skills. So, roll up your sleeves, grab your knife, and get slicing—you’ve got this.


Mastering Vegan Plating: A Guide to Wow-Worthy Presentation
Height and Dimension Techniques
When it comes to plating, height is like the secret weapon you never knew you needed. Think about it: a dish with some vertical action immediately screams, “Look at me!” It’s the food equivalent of great posture. But don’t worry, you’re not building a skyscraper here—this is about a subtle, elegant lift that gives your plate a touch of drama. Layers are your best friend. Stack roasted vegetables like eggplant, zucchini, and bell peppers for a rainbow of textures. Or maybe create a mini avocado-mango tower that’s practically begging to be Instagrammed.
But let’s not stop at stacking. Height isn’t just about piling food up like a game of Jenga. It's about creating dimension, like the plate has a little story to tell. You can lean elements, like propping crispy tofu against a bed of greens, so it looks effortlessly cool—kind of like the James Dean of vegan plating. Or use something unexpected, like a delicate cracker or a crunchy chip, to add height without weighing things down. The goal is balance: you want your dish to look impressive, but not like it’s about to topple over like a poorly built sandcastle.
And while we’re on the subject, let’s talk about shapes. Mixing shapes is a great way to trick the eye into seeing more dimension. Got a bunch of round elements on the plate? Break things up with a rectangle of roasted sweet potato or a triangle-shaped flatbread. Straight lines and curves playing off each other keep the whole look dynamic and exciting. It’s like the visual equivalent of a power couple.
Texture also plays a major role in creating depth. Soft, velvety elements like purees can act as a smooth base layer, while crispy components, like fried shallots or crunchy seeds, add that satisfying pop. Think of your plate like a stage—some ingredients are the main performers, and others are the backup dancers, adding texture and movement to the overall presentation. You want everyone in the audience (or at the table) to be leaning in for a closer look.
Oh, and don’t underestimate the power of angles. A slight tilt in how you place something can change the whole vibe of the plate. A slice of roasted beet balanced on its edge instead of lying flat suddenly turns it into a piece of edible architecture. Even something as simple as laying a wedge of citrus at an angle instead of straight up and down can make your plating look way more polished. It’s those little details that separate the pros from the amateurs.
Props can also come in handy—but don’t go overboard. A well-placed ramekin of sauce or a crisp cracker standing upright can add height without stealing the spotlight. And if you’re really feeling fancy, try using edible garnishes like baked vegetable chips or crispy herbs to add both lift and texture. Just be sure everything you add is functional, not just pretty. After all, this is food, not a museum exhibit.
And remember, height doesn’t have to mean formal or fussy. A tall stack of fluffy pancakes at brunch is just as effective as an avant-garde vegetable sculpture. Whether you’re going for chic and modern or cozy and approachable, height adds that little something extra. So grab your plating tools, and let’s get stacking!
Color Balance and Contrast

Color is the silent hero of any beautifully plated dish. It’s that extra little nudge that says, “Hey, this is going to taste amazing.” But getting it right is an art form—you’re not just tossing random hues onto a plate like you’re finger painting. No, this is about crafting a visual feast that makes people’s eyes light up before their forks even hit the table.
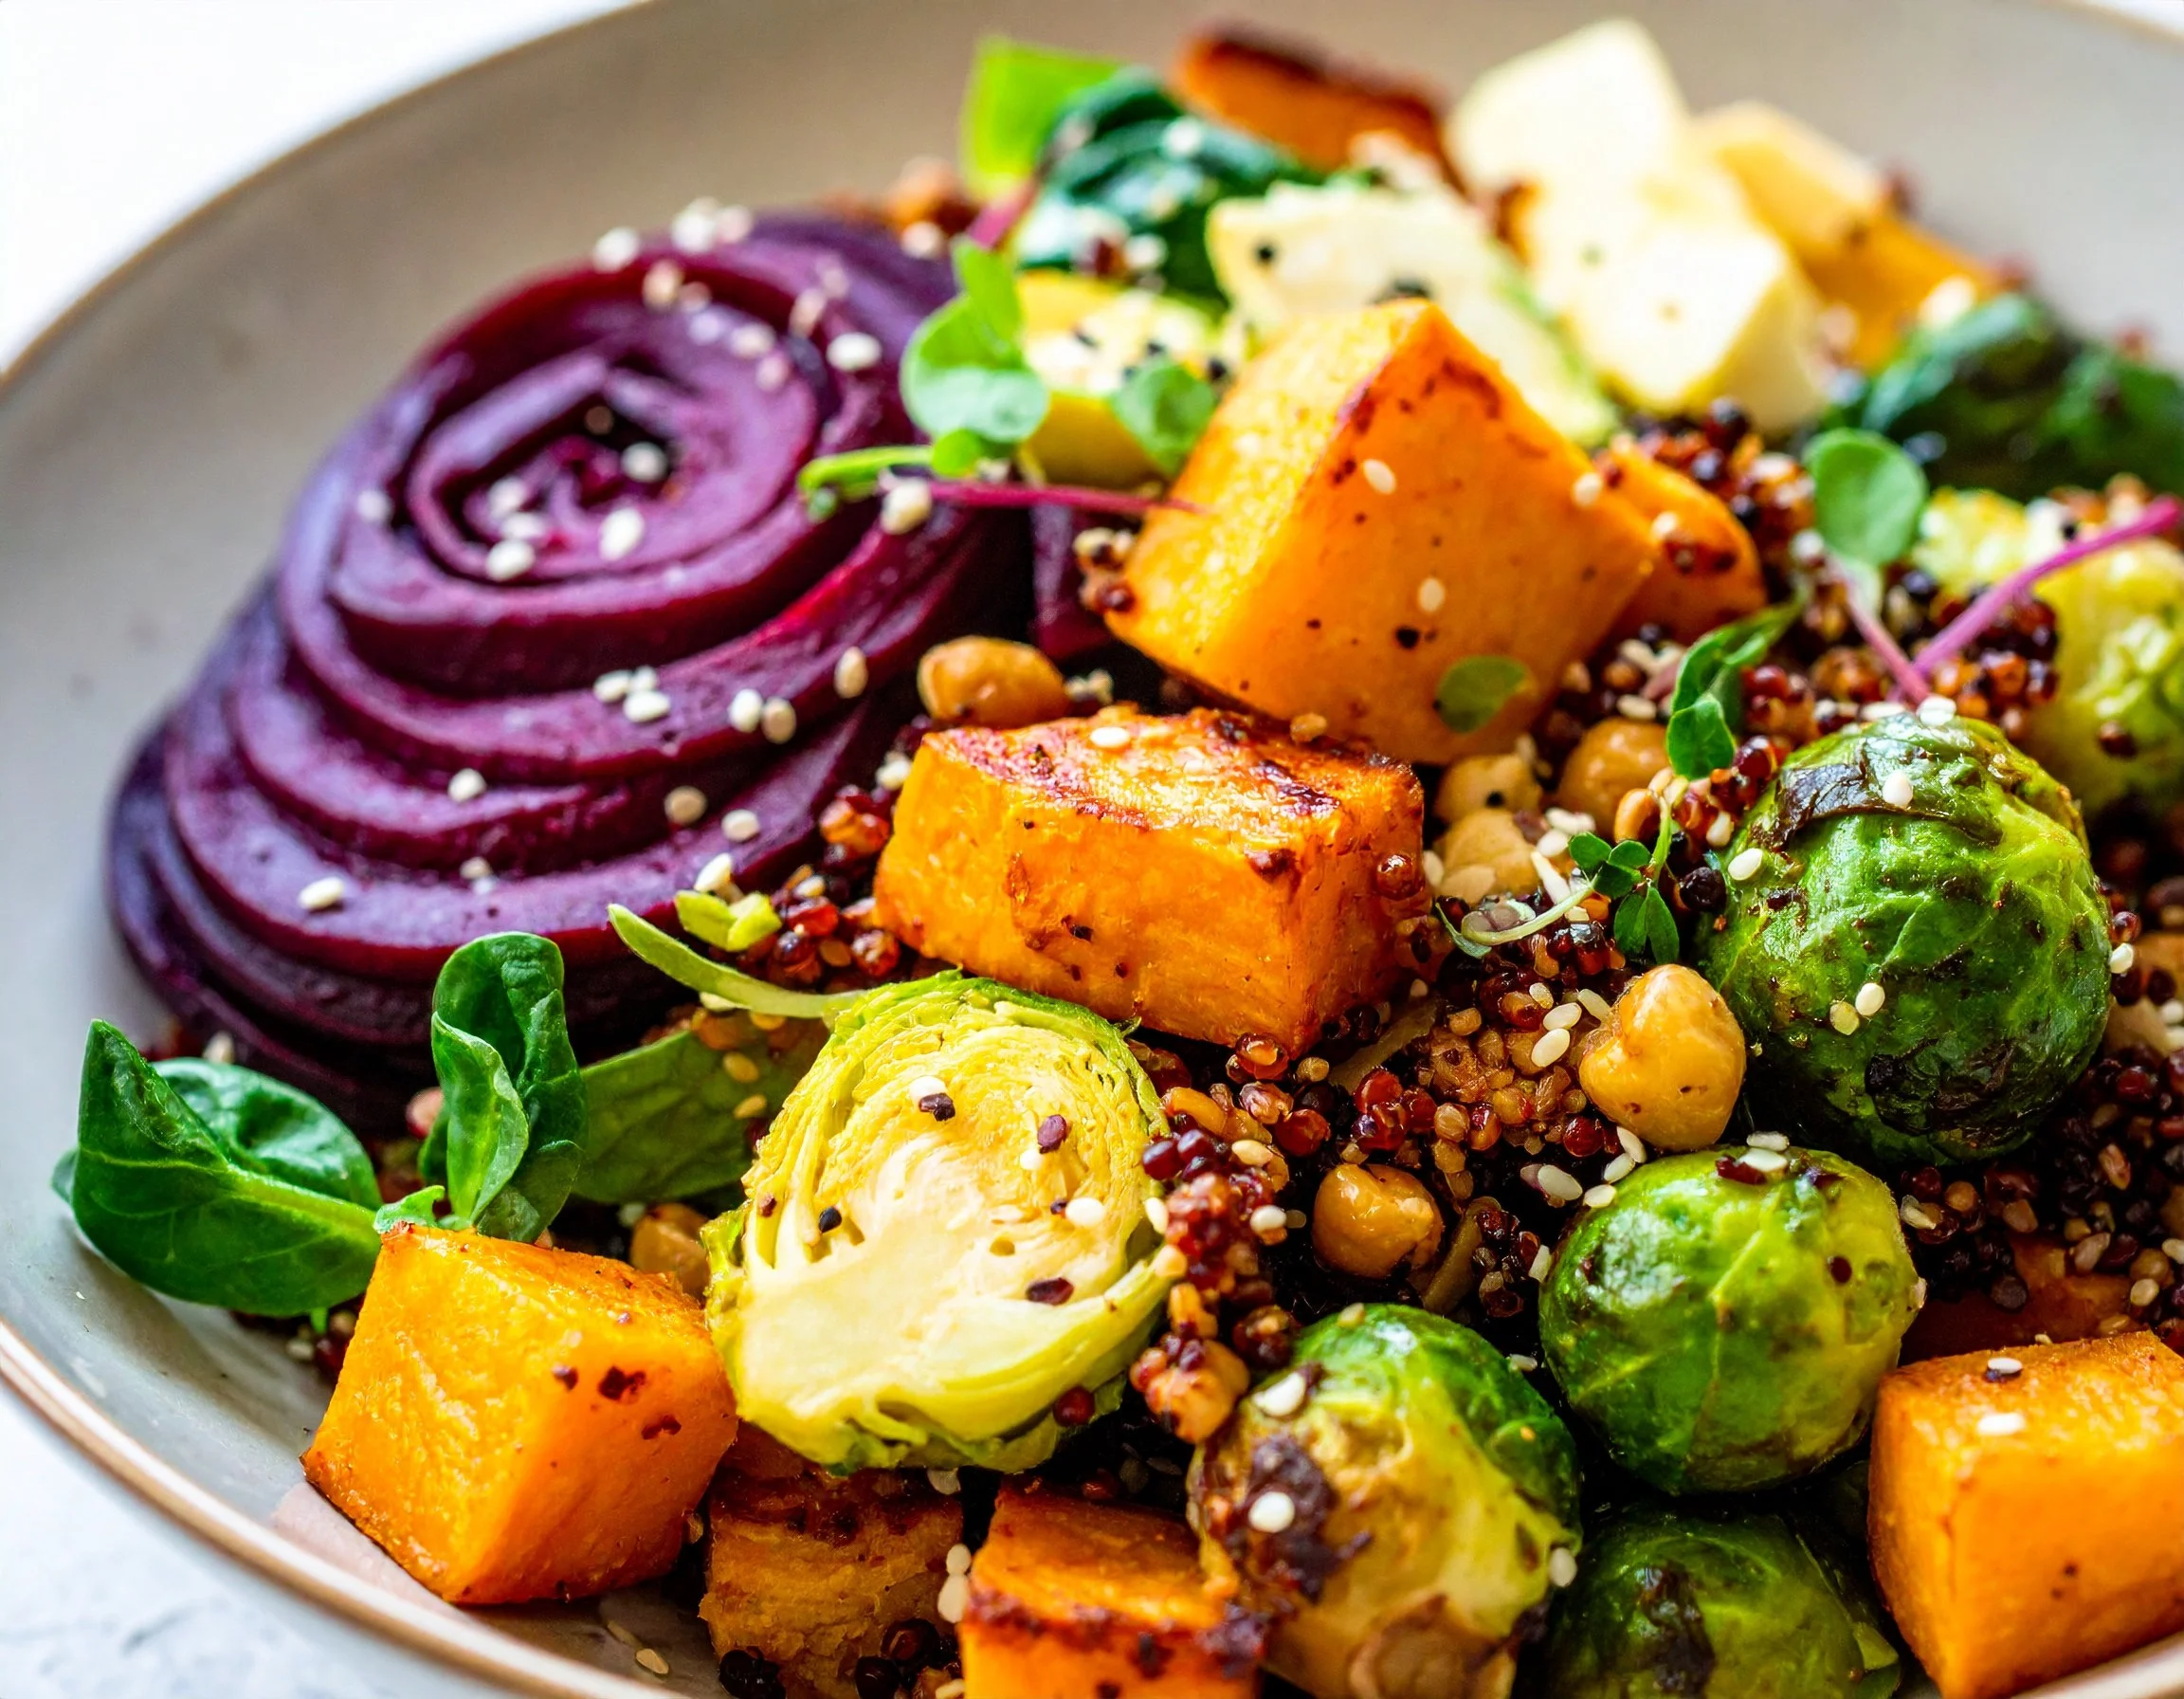
First things first: think about your plate like it’s a blank canvas, and you’re the next great artist. The key is to pick a range of colors that pop without turning the whole thing into a chaotic mess. Start with a base—something neutral, like a creamy cauliflower puree or some fluffy couscous. Then, layer in those bold, vibrant colors that practically shout “fresh and delicious!” Deep orange roasted carrots, bright green snap peas, ruby-red pomegranate seeds—they’re all fair game. And hey, don’t forget about earthy tones like golden brown roasted mushrooms or deep purple eggplant to anchor the whole look. It’s all about balance, not a confetti explosion.
Contrast is where the magic happens. Think about pairing opposites to make each color shine. A sunny yellow curry against a bed of black rice is a power move. Or imagine the crisp, clean white of a coconut yogurt sauce drizzled over roasted crimson beets. The colors don’t just sit there; they play off each other, making everything look more vibrant. Bonus points if you can add an unexpected twist—like a sprinkle of bright pink pickled onions on top of an otherwise earthy-toned dish. It’s the edible equivalent of a mic drop.
Now, let’s talk about transitions. You don’t want one side of the plate to look like a neon parade while the other is stuck in a beige wasteland. Smooth it out. Think of a gradient—a flow of colors that guides the eye across the dish. For example, place pale green avocado slices next to vibrant cherry tomatoes, followed by a scattering of toasted quinoa for texture. It creates a natural rhythm that feels cohesive, not chaotic.
And while we’re on the topic of creating visual interest, let’s not ignore how textures and colors team up. Think glossy, glistening sauces paired with matte, roasted veggies. Or how about the sparkle of flaky sea salt or edible flowers over a smooth soup? Even something as simple as adding a bright green drizzle of parsley oil to a bowl of butternut squash soup can elevate the whole thing. Texture and color are like peanut butter and jelly—they’re just better together.
Another trick? Play with temperature to enhance your colors. For example, a roasted red pepper looks bold and rich when it’s fresh out of the oven, but if you let it cool to room temp, its color might dull. The same goes for leafy greens—hit them with a quick sauté to make their color pop, but don’t overcook them into a sad, wilted mess. Heat works like magic on pigments, so use it wisely.
And don’t forget, the plate itself can influence how your colors are perceived. White plates are classic for a reason—they make your ingredients look brighter and more defined. But if you want to get a little wild, try plating on black, slate, or even colorful ceramics. The right backdrop can take your color palette from pretty good to absolutely stunning. Just don’t let the plate steal the spotlight—this is still all about the food, after all.
Oh, and if you’re working with ingredients that are all in a similar color family—like a golden beet salad with roasted sweet potatoes and turmeric dressing—break it up with something that contrasts. A few purple basil leaves or a sprinkle of toasted pistachios can add just enough variation to keep things interesting. Think of it as the visual exclamation point on your edible masterpiece.
Color also isn’t just about aesthetics; it’s about signaling flavor. Bright reds and oranges scream bold and tangy, while greens tend to whisper “fresh and herbaceous.” Pay attention to what your colors are saying, and make sure they match the flavor story you’re trying to tell. No one wants a plate that looks exciting but tastes like cardboard.
Sauce Application Methods
When it comes to sauce, it’s not just about taste—it’s a whole production. A great sauce application can turn your dish into a jaw-dropping centerpiece, the kind of plate people hesitate to eat because it’s *too* pretty. And no, you don’t need to be a culinary Picasso to pull it off. All you need is a little creativity and some tools that double as your culinary magic wand.
First, let’s talk tools of the trade. Spoons, squeeze bottles, and even paintbrushes can transform sauce into edible artwork. A trusty spoon isn’t just for stirring—it’s perfect for creating those dramatic swooshes that scream sophistication. Drag it through a dollop of red pepper coulis, and suddenly your plate looks straight out of a five-star kitchen. Meanwhile, squeeze bottles? Total game-changers. They’re your secret weapon for precision—dot, drizzle, or even draw patterns like a pro. Feel like adding a flourish? Dip a small pastry brush into a rich green pesto and give the plate a gentle swipe. It’s less “messy dinner” and more “Michelangelo would be jealous.”
Now, let’s get into the fun part: how to actually get that sauce on the plate. Don’t just slap it on there like you’re rushing to catch the next episode of your favorite show. Think about the vibe of your dish. Is it playful and bright? Go for bold, clean lines or polka dots that feel whimsical. More elegant and subdued? Try a minimalist design—maybe a single streak of sauce sweeping across the plate, like a food runway. If you’re really feeling adventurous, use a spoon to create an ombré effect by dragging one sauce into another, blending the colors like you’re plating a sunset.
Layering sauces is another trick to take things up a notch. This isn’t about piling them up like a condiment buffet—it’s about creating depth and contrast. Picture a swirl of creamy cashew sauce topped with a few dollops of vibrant herb oil. Not only does this add visual intrigue, but it also gives the diner that “wow” moment when the flavors come together. Bonus points if your sauces bring different textures to the table: velvety, glossy, chunky—mix it up. Variety isn’t just the spice of life; it’s the sauce of life too.
Placement is key, though. Sauces can frame a dish, highlight its best features, or even steal the spotlight (in the best way). A zigzag of teriyaki glaze around a tofu stack adds drama without overshadowing the main act. A few small dollops of beet puree circling a roasted carrot salad? Chic and modern. And don’t sleep on negative space—it’s your secret ally in creating that high-end aesthetic. A clean, white plate with a small but striking pool of sauce in one corner can make your food look like it’s living its best minimalist life.
While you’re in creative mode, don’t be afraid to embrace geometry. Straight lines, arcs, spirals—sauce can bring structure to your plate. A neat row of dots trailing off the edge of a rectangular plate gives a modern, edgy feel. Meanwhile, a sweeping curve of coconut-lime dressing around a tropical quinoa salad is like a visual hug for the ingredients. And if you’re working with round plates, spiral designs can draw the eye toward the center, focusing attention exactly where you want it.
One pro tip? Use the sauce to guide the diner’s fork. Sauce placement can subtly suggest how someone should approach the dish. A pool of tahini at the edge of the plate, for example, invites them to drag a bite of falafel through it, while a drizzle over a roasted vegetable platter encourages them to get all the flavors in one glorious bite. It’s like leaving a little roadmap to flavor town.
But let’s get real: the sauce isn’t just there to be pretty—it’s there to amp up the flavors of the dish. If your roasted sweet potato and black bean enchiladas are the Beyoncé of the plate, the mole sauce is definitely the Kelly Rowland—essential and unforgettable. Keep the flavors in balance with the dish, and make sure the application highlights, rather than hides, what’s underneath.
Garnish Placement Strategy
Garnishes are like the accessories of the culinary world—they’re not the star of the show, but wow, do they have the power to pull the whole look together. Think of them as the earrings or the pocket square that takes an outfit from fine to fabulous. But let’s be clear: this isn’t about tossing a handful of parsley on the plate like you’re sprinkling confetti at a birthday party. Garnishing is an art, and with a little intention and creativity, it can transform your dish into a masterpiece.
Start by thinking about the story you want your plate to tell. Garnishes shouldn’t feel like an afterthought—they should connect to the flavors, textures, and vibe of the dish. Are you serving up a warm, hearty grain bowl? A scattering of toasted sesame seeds or crushed pistachios can add a bit of crunch and a touch of sophistication. Going for something light and summery? Maybe a few delicate microgreens or edible flower petals are just what you need to give it that extra burst of freshness. The key is to make sure your garnish adds to the dish, both visually and flavor-wise, without stealing the spotlight.
Placement is where the magic happens. Instead of plunking everything in the middle of the plate, think about how the garnish can guide the eye across the dish. Sprinkle chopped chives in a diagonal line for a dynamic look, or cluster pomegranate seeds around the edge of a salad for a pop of vibrant color. Want to add some height? Tuck a sprig of fresh rosemary or a crisp cracker standing upright for a little vertical flair. It’s like arranging flowers—only these taste way better.
And speaking of taste, don’t forget that garnishes should bring more to the table than just a pretty face. The best garnishes add a flavor boost or textural contrast. For example, a pinch of flaky sea salt sprinkled over roasted vegetables can make their natural sweetness sing. Or a quick zest of lemon over a plate of pasta can brighten the whole dish in one simple step. It’s these small, thoughtful touches that turn “good” into “next-level delicious.”
Now, let’s talk about proportion. It’s tempting to go all out when you’ve got a fridge full of potential garnishes, but restraint is your friend here. Too much, and your plate starts looking like it’s auditioning for a reality show called *Garnish Gone Wild.* The goal is to enhance, not overwhelm. A few well-placed elements will always look more polished than a chaotic sprinkle-fest.
Texture is another hero in the garnish game. Think about what your dish might be missing. Is everything on the plate soft and creamy? Add a crisp, crunchy garnish, like fried shallots or roasted chickpeas, to break things up. On the flip side, if your dish is all about crunch, balance it out with something smooth and luxurious, like a dollop of cashew cream or a swirl of tahini. It’s all about creating balance so every bite feels exciting and satisfying.
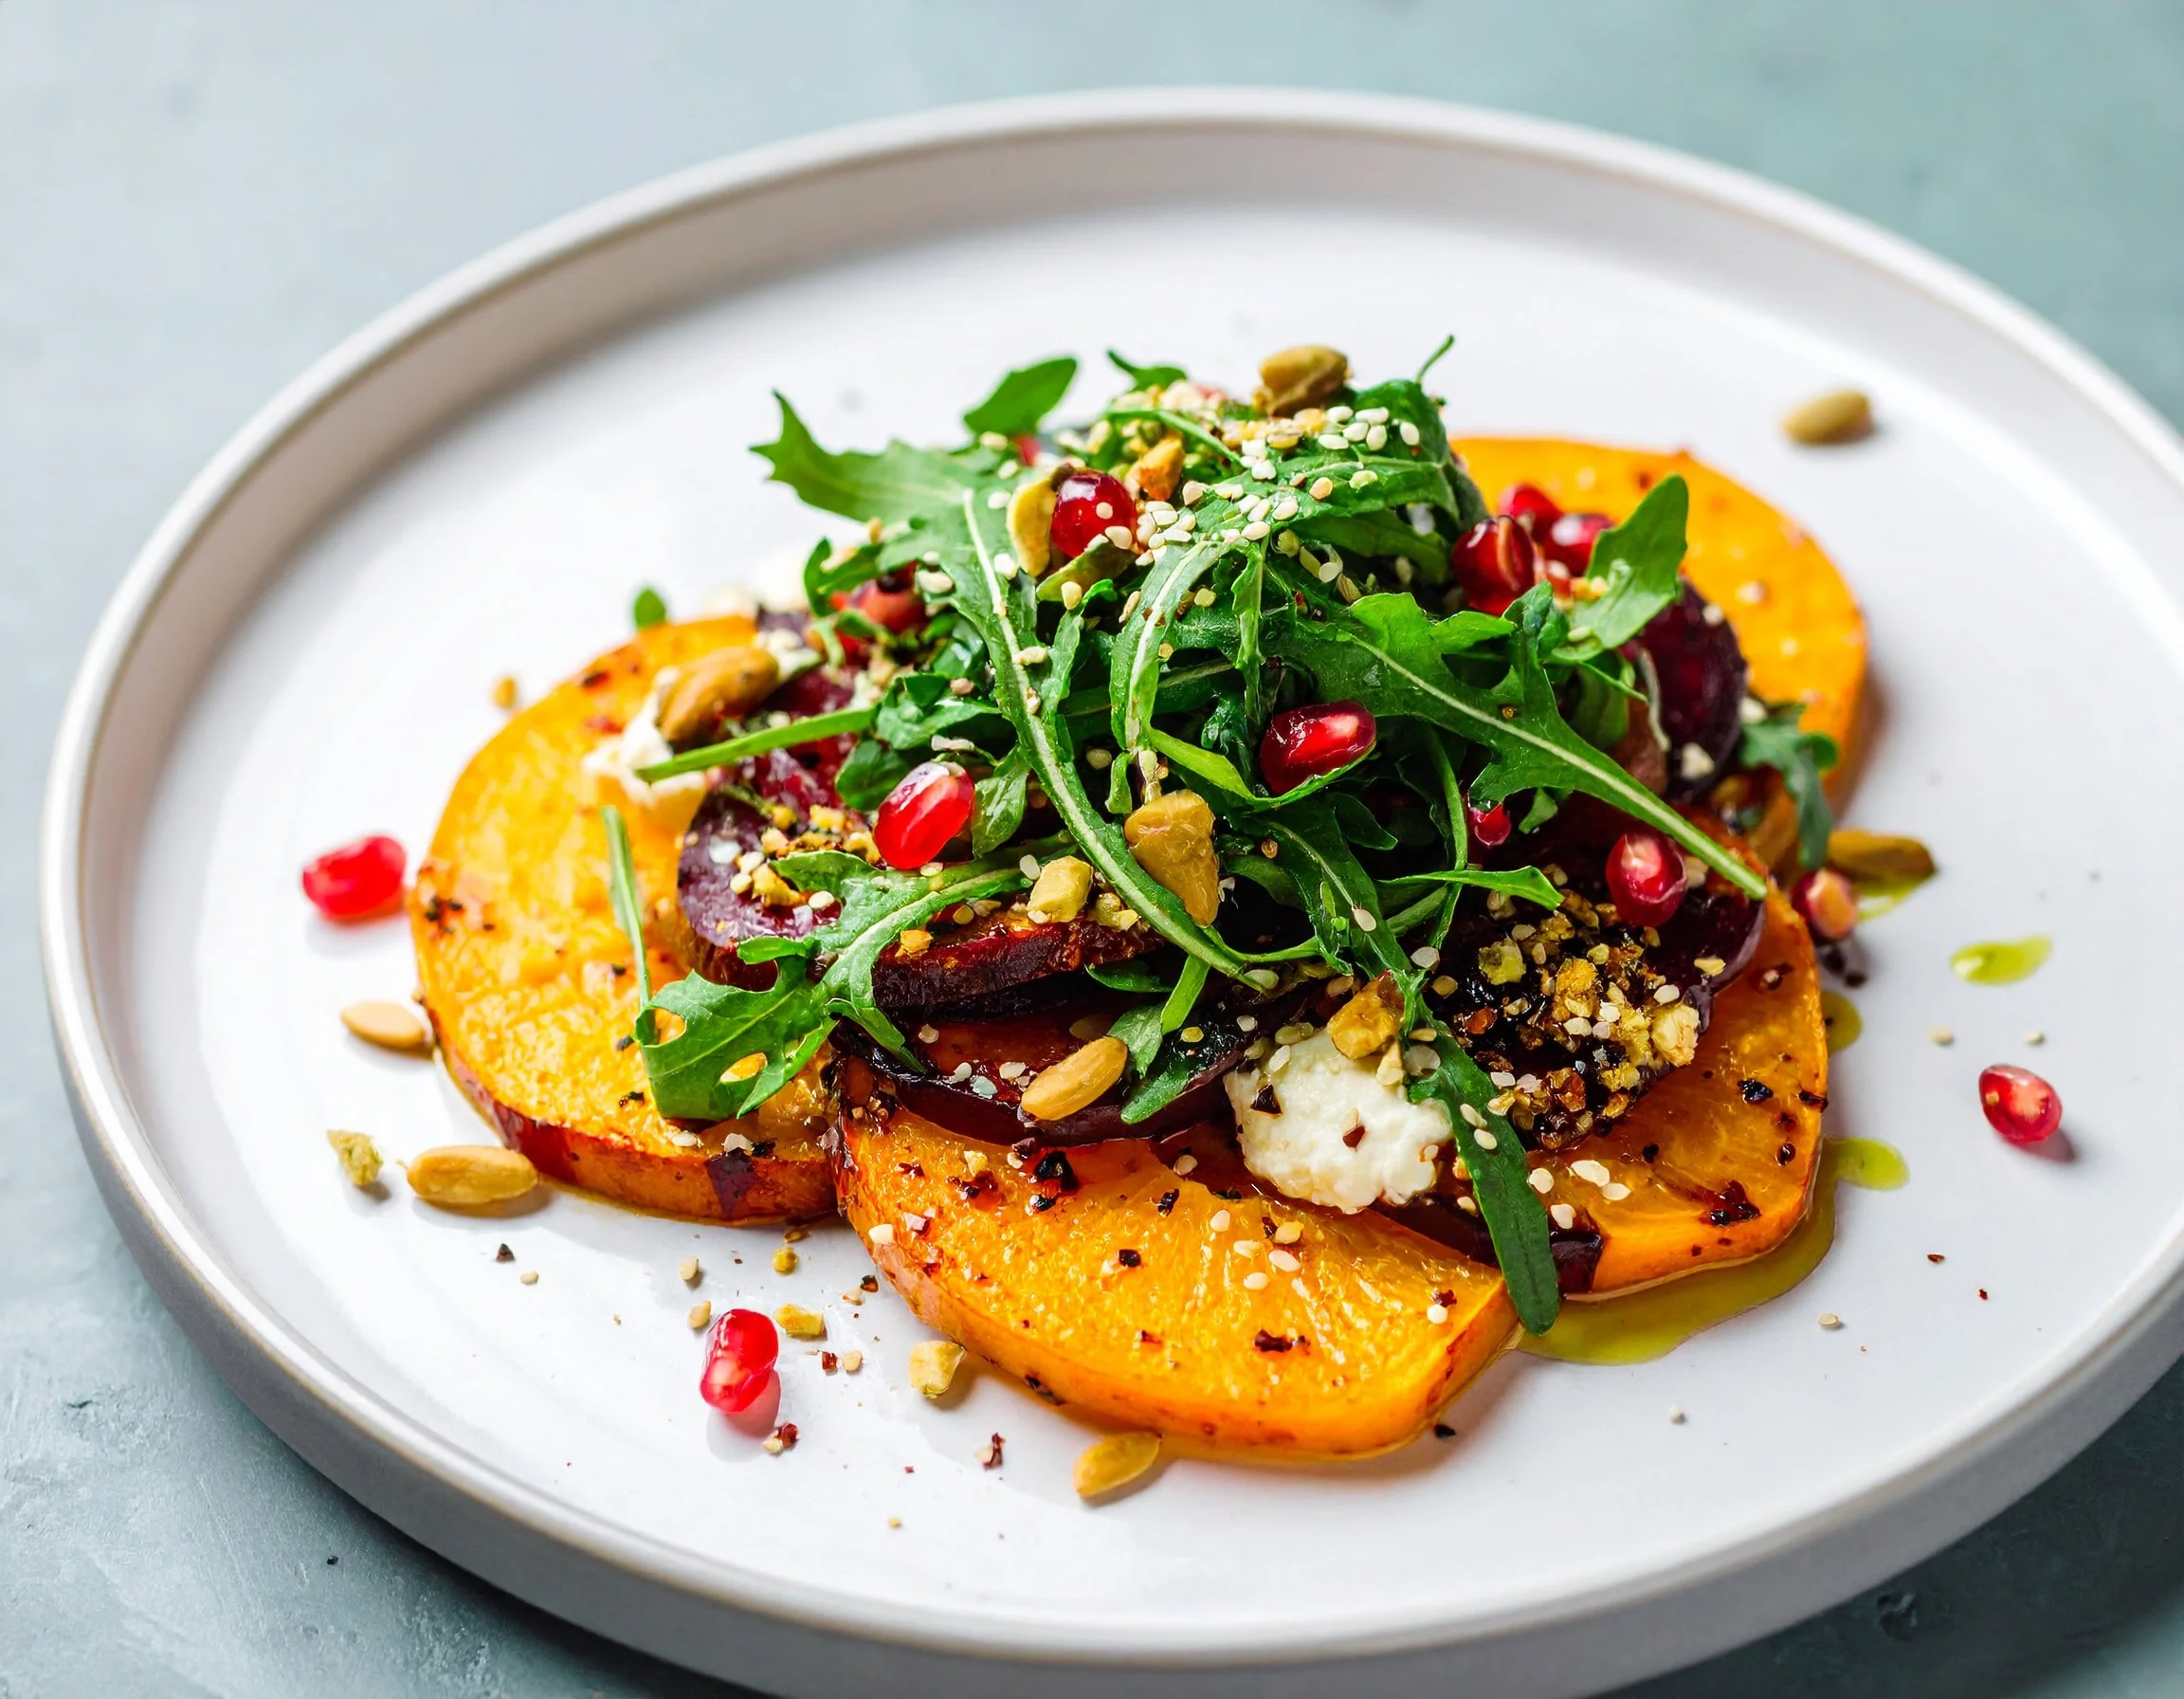
Color, of course, is a huge part of the equation. A bright garnish can liven up an otherwise monochromatic dish. Imagine a deep orange butternut squash soup with a swirl of green herb oil and a sprinkle of ruby-red pomegranate seeds—it’s practically begging for a close-up. But don’t just throw on the first colorful thing you can find. Make sure the colors harmonize with the overall palette of the dish. You’re not painting by numbers here; you’re creating a composition.
Finally, remember to keep it functional. If you’re adding edible flowers, make sure they actually taste good with the dish (and that they’re safe to eat—this isn’t the time to test your knowledge of backyard botany). And if you’re using a garnish with a strong flavor, like fresh mint or dill, use a light hand. You want it to complement the dish, not hijack it.

Veggies That Slay: Your Go-To VeganStir-Fry Recipe
First off, let’s give a round of applause to the carbs in this dish. At 40 grams per serving, they’re here to provide that steady, feel-good energy we all need to power through the day. Whether you’re conquering a workout, chasing after kids, or just trying to stay awake during that 3 PM meeting, these carbs have your back. And before anyone even thinks the word “guilt,” let’s remember—carbs are your friends. Especially when they’re coming from fresh veggies and whole grains like the ones we’ve got here.

Preparation Time:
30 min.
Difficulty:
Intermediate
Total Calories:
350 kcal
Ingredients:
2 cups broccoli florets
1 cup bell peppers, sliced
1 cup carrots, julienned
1 cup snap peas
1 cup mushrooms, sliced
3 cloves garlic, minced
1 tablespoon ginger, grated
3 tablespoons soy sauce
2 tablespoons sesame oil
1 tablespoon rice vinegar
1 tablespoon sesame seeds
Salt and pepper to taste
Cooked rice or noodles for serving
Kitchen Tools Needed:
Large frying pan
Spatula
Measuring cups
Knife
Cutting board
Instructions:
Heat sesame oil in a large pan over medium heat.
Add garlic and ginger, sauté for 1-2 minutes until fragrant.
Add broccoli, bell peppers, carrots, snap peas, and mushrooms to the pan.
Stir-fry the vegetables for about 5-7 minutes until they are tender-crisp.
Pour in soy sauce and rice vinegar, stirring to coat the vegetables evenly.
Cook for an additional 2-3 minutes, allowing the sauce to thicken slightly.
Season with salt and pepper to taste.
Serve over cooked rice or noodles, and sprinkle with sesame seeds.
Macros:
Total Calories: 350kcal
Carbs: 40g
Proteins: 10g
Fats: 15g
Essential Ingredients for Stir-Fry
Let’s get to the stars of this show—the veggies! First up, broccoli florets, nature’s little trees packed with fiber and vitamins, ready to turn your stir-fry into a nutrient powerhouse. Then, we’ve got bell peppers bringing the party with their vibrant colors and a natural sweetness that’ll make your taste buds smile. Now, carrots—they’re not just here for crunch but for that pop of orange that feels like sunshine on your plate. Plus, julienning them? Oh, that’s the kind of satisfying knife work that’ll have you channeling your inner kitchen ninja.

Snap peas are up next, adding a delightful snap (go figure) and a subtle sweetness to balance out the savory flavors. And mushrooms? Don’t even get me started. They’re the umami-packed heavy hitters of this dish, soaking up the sauce like sponges of flavor. Finally, let’s give it up for garlic and ginger, the unsung heroes of almost every great stir-fry. Minced garlic brings the aroma that makes you feel like you could sell this dish on the street, while freshly grated ginger adds that zingy warmth that keeps everything interesting.
When it comes to these veggies, freshness is your secret weapon. The crunchier, juicier, and more vibrant they are, the better your stir-fry will taste—and look. Don’t be afraid to mix it up if you’ve got a few extra veggies hanging out in your fridge. Zucchini? Why not. Baby corn? Absolutely. Stir-fries are all about flexibility and making the most of what you’ve got. Just make sure to slice everything evenly so they cook up beautifully without any underdone stragglers or overdone mush. A little prep work goes a long way, and trust me, your future self will thank you.
Mastering Knife Techniques
Ready to level up your knife skills and feel like a true kitchen warrior? Let’s talk about julienne cutting—the technique that transforms your veggies into perfect little matchsticks, ideal for stir-fries, salads, or just impressing your friends. It might sound intimidating, but with a little practice (and maybe some epic music playing in the background), you’ll be slicing like a pro in no time.
First things first, you need the right setup. A sharp knife is non-negotiable here—dull blades are the enemy of precision and, frankly, your fingers. Grab a sturdy cutting board, roll up your sleeves, and prepare to unleash your inner chef. The secret to good knife work? It’s all about control. Hold your knife firmly, but don’t white-knuckle it—think steady, not stressed. Your guiding hand should form a gentle claw, with your fingertips safely tucked under like they’re hiding from the blade. No need to play the hero here; safety first, always.
Start by cutting your veggie into manageable pieces. For something like a carrot, slice it into even sections that are easy to handle. Then, cut those sections into thin, flat planks. Stack the planks like a tiny vegetable Jenga tower (but don’t let them topple), and slice through them lengthwise to create those beautiful matchstick strips. The key is to keep your slices consistent in size. Nobody wants a stir-fry with some bits cooking faster than others—it’s all about harmony, people!
Speed is tempting, especially when you’re trying to channel your inner cooking show contestant, but trust me, precision beats pace every time. Rushing can lead to uneven cuts or, worse, an accidental nick. Go slow, focus on your form, and soon enough, you’ll find your rhythm. And hey, if your first few attempts look more like a pile of random sticks than uniform matchsticks, don’t sweat it. Practice makes progress.
Feeling fancy? Once you’ve nailed julienning, try stepping up to more challenging shapes and techniques. Thinly slicing mushrooms or quickly dicing bell peppers might not earn you a Michelin star, but it’s those little moments of finesse that make you feel like you’re running your own restaurant. Plus, mastering these skills is oddly therapeutic—it’s just you, your knife, and a pile of veggies waiting to be transformed.
And remember, this isn’t just about looking cool (though you will). Good knife skills are a game-changer for how your dish comes together. Evenly cut veggies mean everything cooks at the same speed, so you don’t end up with half your snap peas still raw while your carrots have turned to mush. It’s like giving your ingredients a little extra love—and trust me, your taste buds will notice the difference.

Cooking Instructions
Time to bring those vibrant veggies to life! Start by heating sesame oil in a large frying pan over medium heat. Let the oil do its thing, shimmering like liquid gold. The moment it’s ready, toss in the minced garlic and grated ginger. Oh, the sizzle! That aromatic duo will make your kitchen smell so heavenly, neighbors might show up pretending they just “happened to stop by.” Stir them around for a minute or two until they’re fragrant, but don’t let them burn—burnt garlic is the saddest plot twist in cooking.
Next, introduce your colorful cast of characters to the pan: broccoli, bell peppers, carrots, snap peas, and mushrooms. Stir-frying is all about motion, so keep everything moving. You’re not just cooking; you’re orchestrating a dance party in your pan. The veggies should glisten as they absorb the sesame oil while staying crisp enough to give that perfect bite. Remember, tender-crisp is the name of the game here—no one invited mush to this party.
Now comes the fun part: the sauce. Pour in the soy sauce and rice vinegar, and watch as your stir-fry gets an instant glow-up. The veggies will start soaking in the savory, tangy goodness, and the sauce will coat everything in a light, glossy sheen. Don’t just dump it and walk away—give it a loving stir so every bite is bursting with flavor. Let it all cook together for another 2 to 3 minutes while the sauce thickens just enough to cling to your veggies without overwhelming them. It's that perfect balance between bold flavor and fresh crunch.
Serving Suggestions
Alright, so you’ve got your sizzling stir-fry ready to go—now it’s time to decide what’s going underneath all that veggie goodness. Let’s talk options, because what you serve it with can take this meal from “oh, that’s good” to “wow, I’m a culinary wizard!”
First up, rice. The classic, the dependable, the MVP of stir-fry bases. Whether it’s fluffy white rice, nutty brown rice, or even fancy jasmine or basmati, this grain is here to soak up all the sauce and deliver it straight to your taste buds. Pro tip: If you’ve got leftover rice chilling in your fridge, now’s its time to shine. Day-old rice is actually ideal for stir-fries since it’s a bit drier, meaning it won’t turn into a sticky mess. Just fluff it up a bit before serving and watch it become the perfect sidekick to your vibrant veggies.
Not a rice fan? No worries—enter noodles. Oh yes, stir-fry and noodles are a match made in carb heaven. Go for thin rice noodles if you want something light and silky, or choose thick udon noodles if you’re craving something a little more hearty. Soba noodles, made from buckwheat, bring a slightly nutty flavor to the party, while spaghetti (yes, spaghetti!) works in a pinch if that’s what’s hanging out in your pantry. Toss those noodles into the pan for the last minute or two of cooking to let them soak up the sauce and get cozy with the veggies. It’s a glorious tangle of flavors and textures that’ll make you wonder why you don’t eat noodles with every meal.
But hey, who says you need a traditional base at all? Stir-fries are versatile enough to pair with just about anything. Cauliflower rice? Great for keeping things light while still delivering that satisfying bite. Quinoa? A protein-packed twist that’ll leave you feeling extra smug about your health game. Even a bed of fresh greens like spinach or arugula can work beautifully—the heat from the stir-fry will wilt the leaves just enough, creating a warm salad situation that feels both fancy and effortless.
Now let’s talk toppings, because no stir-fry is complete without a little extra flair. A sprinkle of sesame seeds is a no-brainer—they’re tiny, nutty bursts of flavor that also make your dish look all cute and Instagram-ready. Feeling spicy? Add a drizzle of sriracha, a few chili flakes, or even a splash of chili oil for that fiery kick. Craving something fresh? A handful of chopped green onions or fresh cilantro on top can add a bright, herby note that balances the rich, savory flavors below. And if you’re feeling a little extra (and why not?), crushed peanuts or cashews bring a delightful crunch that takes things to the next level.
Got leftovers? Lucky you! Stir-fry reheats like a dream, so don’t hesitate to pack it up for tomorrow’s lunch. You can even repurpose it—wrap it up in a tortilla with some avocado for an impromptu vegan burrito, or toss it with a little veggie broth for a quick soup. Basically, stir-fry is the gift that keeps on giving, and there’s no wrong way to enjoy it.
Nutritional Information

Alright, let’s talk about the behind-the-scenes brilliance of this stir-fry. We’re not just talking flavor fireworks here—this dish is a nutritional powerhouse in disguise. Packed with all the good stuff, it’s the kind of meal that fills you up without weighing you down. Think of it as a love letter to your body, written in vibrant veggies and balanced macros.
First off, let’s give a round of applause to the carbs in this dish. At 40 grams per serving, they’re here to provide that steady, feel-good energy we all need to power through the day. Whether you’re conquering a workout, chasing after kids, or just trying to stay awake during that 3 PM meeting, these carbs have your back. And before anyone even thinks the word “guilt,” let’s remember—carbs are your friends. Especially when they’re coming from fresh veggies and whole grains like the ones we’ve got here.
Protein? Oh, we’ve got that covered too. With 10 grams per serving, this dish proves you don’t need meat to hit those protein goals. The combo of broccoli, snap peas, and even the humble mushrooms all come together to pack a plant-powered punch. Bonus points for the fact that this is clean, lean protein, giving your body the fuel it needs to stay strong and keep moving.
Now, let’s talk about fats—15 glorious grams of them, coming mainly from that luscious sesame oil. It’s the kind of fat that works for you, not against you. Think heart-healthy, brain-boosting, and downright delicious. Plus, sesame oil doesn’t just bring flavor to the table; it’s loaded with antioxidants and healthy fats that help keep your skin glowing and your cells happy. It’s basically the Beyoncé of cooking oils—flawless and irreplaceable.
And we can’t forget the unsung heroes of nutrition: fiber, vitamins, and minerals. Broccoli is bringing its A-game with a generous dose of vitamin C and fiber to keep your digestion humming along smoothly. Bell peppers are loaded with vitamin A and antioxidants, carrots deliver beta carotene for that healthy glow, and snap peas contribute a nice dose of vitamin K. Oh, and mushrooms? They’re not just soaking up the sauce—they’re packing B vitamins and a surprising amount of selenium, which is great for immune health. Garlic and ginger, aside from being flavor powerhouses, have their own superpowers—antimicrobial and anti-inflammatory properties that make you feel as good as this dish tastes.
The best part? This isn’t one of those meals where you feel like you’ve eaten a “healthy” dish and then an hour later, you’re back in the fridge hunting for snacks. Nope, this stir-fry is satisfying in all the right ways. The balance of macros keeps you full, energized, and feeling like the rockstar you are. Plus, it’s light enough that you won’t be fighting off a food coma afterward. Win-win, right?
Oh, and let’s not forget the customizable aspect of this dish. Depending on what you pair it with—whether it’s rice, noodles, or even quinoa—you can tweak the nutritional profile to fit your needs. Looking for an extra protein boost? Add a handful of edamame or top it with some toasted peanuts. Want fewer carbs? Serve it over cauliflower rice or fresh greens. The beauty of this recipe is that it’s as flexible as you need it to be.
At the end of the day, this stir-fry isn’t just food—it’s self-care in a skillet. It’s the kind of meal that reminds you eating well doesn’t have to be boring or complicated. It’s vibrant, flavorful, and balanced, proving that nutritious can absolutely mean delicious. Your body and taste buds are officially in for a treat.